Installing Graphite with Ceres and Megacarbon

Graphite has changed much in the last year, though you wouldn’t know it from reading the official site. Much work has gone in to the new metric writer, Ceres, to improve on the already fantastic Whisper backend which has been the default in the past. Ceres allocates space as metrics are recorded, so your storage needs will scale more directly with use than with Whisper. Additionally, the various carbon daemons (carbon-cache, carbon-relay, etc.) have all been merged into a single daemon called “Megacarbon”. This new daemon supports all the same functionality but streamlines the configuration process. These instructions are for Ubuntu Server 13.04, but you can probably adapt them to your distro of choice if you have sufficient experience.
To start with, you’ll need to get some tools and libraries to help you configure everything. These will need to be installed system-wide:

sudo aptitude install git python-pip python-dev libcairo2 libffi-dev memcached uwsgi nginx uwsgi-plugin-python uwsgi-plugin-carbon
sudo pip install -U pip # Get the latest pip
sudo pip install -U virtualenvwrapper # Get the latest virtualenvwrapper

Now that you’ve got the requirements installed, you’ll need to create a user for graphite:

sudo adduser graphite

You’ll be prompted for details about the user, enter anything you wish. I recommend a 64 or more character password, and that you do not bother to record it. With sudo access to the box, you will not need it. The next step is creating the graphite storage location. I prefer /opt/graphite for this:

sudo mkdir /opt/graphite
sudo chown -R graphite.graphite /opt/graphite
sudo chmod 751 /opt/graphite # More on this later

Now switch to your graphite user and configure virtualenv wrapper:

sudo su - graphite
source /usr/local/bin/virtualenvwrapper.sh
echo "source /usr/local/bin/virtualenvwrapper.sh" >> .bashrc

Once virtualenvwrapper is configured, you can create the new virtualenv and start installing graphite:

mkvirtualenv -a /opt/graphite graphite # This should change your directory to /opt/graphite

We need a directory for our sources:

mkdir src
cd src/

From the src folder, we can start installing graphite components:

export GRAPHITE_ROOT=/opt/graphite
git clone git://github.com/graphite-project/carbon.git -b megacarbon
cd carbon/
pip install -r requirements.txt
python setup.py install
cd $GRAPHITE_ROOT/src/
git clone git://github.com/graphite-project/ceres.git
cd ceres/
pip install -r requirements.txt
python setup.py install

Next, configure Ceres’ datastore:

ceres-tree-create /opt/graphite/storage/ceres

Now we need to edit config files. Start by copying the example configs:

cd $GRAPHITE_ROOT/conf/carbon-daemons/
cp -r example/ writer
cd writer/

The three files that you should confirm are configured as you desire are daemon.confwriter.conf, and db.conf. It’s a good idea to read the others as well. The parts you must change are:

in daemon.conf:
USER = graphite

in db.conf:
DATABASE = ceres
LOCAL_DATA_DIR = /opt/graphite/storage/ceres/

The other options can remain the same should you so desire. Now we install the web app:

cd $GRAPHITE_ROOT/src/
git clone git://github.com/graphite-project/graphite-web.git
cd graphite-web/

Unfortunately, I wasn’t able to get pycairo to install properly inside a virtualenv, so I used a drop-in replacement library called cairocffi which works flawlessly as far as I can tell. Remove pycairo from the requirements, and install the remainder along with cairocffi:

sed -i '/cairo/d' requirements.txt
pip install -r requirements.txt
pip install cairocffi

Next, we have a small hack to ensure cairocffi gets used instead of pycairo:

echo 'from cairocffi import *' > /home/graphite/.virtualenvs/graphite/lib/python2.7/site-packages/cairo.py

Finally, install graphite-web:

python setup.py install

Now you need an entry point for your application:

cd $GRAPHITE_ROOT/webapp/

Now create wsgi.py in this folder and populate it with the following text:

import os, sys
os.environ['DJANGO_SETTINGS_MODULE'] = 'graphite.settings'

import django.core.handlers.wsgi

app = django.core.handlers.wsgi.WSGIHandler()

This file will be the module imported by uwsgi to run your app. You should take the opportunity now to configure your database. You can create a superuser now as well, who will be the user you log into the application as:

cd $GRAPHITE_ROOT/webapp/graphite/
python manage.py syncdb

We’re nearly there. Now we get everything starting on boot and configure nginx/uwsgi:

exit # So we're not running as the graphite user

Create and edit /etc/init/carbon-writer.conf and place the following inside (change eth0 to your adapter name from ifconfig):

description "carbon writer"

start on (net-device-up IFACE=eth0 and local-filesystems)
stop on runlevel [016]

expect daemon

respawn limit 5 10

env GRAPHITE_DIR=/opt/graphite
exec start-stop-daemon --oknodo --pidfile /var/run/carbon-writer.pid --startas $GRAPHITE_DIR/bin/carbon-daemon.py --start writer start

Now start the carbon daemon and ensure it’s listening:

sudo start carbon-writer
sudo netstat -plan | grep :2003

You should see a process listening on port 2003. Once that’s up, you can configure the webserver. Create and edit /etc/nginx/sites-available/graphite and enter the following:

server {
  listen 80;
  keepalive_timeout 60;
  server_name graphite.example.com;
  charset utf-8;
  location / {
    include uwsgi_params;
    uwsgi_param UWSGI_CHDIR /opt/graphite/webapp/;
    uwsgi_param UWSGI_PYHOME /home/graphite/.virtualenvs/graphite/;
    uwsgi_param UWSGI_MODULE wsgi;
    uwsgi_param UWSGI_CALLABLE app;
    uwsgi_pass 127.0.0.1:3031;
  }
  location /content/ {
    alias /opt/graphite/webapp/content/;
    autoindex off;
  }
}

Naturally you should substitute example.com for your actual domain. Now we ensure nginx can read the content directory (this is why we set /opt/graphite to permission 751 earlier):

sudo chown -R graphite.www-data /opt/graphite/webapp/content
sudo chmod 751 /opt/graphite/webapp /opt/graphite/webapp/content

Now we create a configuration file for uwsgi. Create and edit /etc/uwsgi/apps-available/graphite.ini and enter the following:

[uwsgi]
plugins = python
gid = graphite
uid = graphite
vhost = true
logdate
socket = 127.0.0.1:3031
master = true
processes = 4
harakiri = 20
limit-as = 256
wsgi-file = /opt/graphite/webapp/wsgi.py
virtualenv = /home/graphite/.virtualenvs/graphite
chdir = /opt/graphite
memory-report
no-orphans
carbon = 127.0.0.1:2003

Note the carbon directive, which tells uwsgi to graph some metrics about accesses, memory, etc. This will be our test data to ensure everything works.

By default in Ubuntu, uwsgi will run as the www-data user and cannot change privileges to the graphite user. To work around this, we can modify the default configuration at /usr/share/uwsgi/conf/default.ini and remove the uid and gid lines. This will allow the graphite.ini file we just created to drop privileges to the graphite user.  As an important security consideration here, you should ensure that all of your individual uwsgi configs specify a uid/gid if you do this.  Never run exposed daemons as root!

We can now enable the application and load the configurations:

sudo ln -s /etc/nginx/sites-{available,enabled}/graphite
sudo ln -s /etc/uwsgi/apps-{available,enabled}/graphite.ini
sudo service nginx restart
sudo service uwsgi restart

If everything went well, you should now be able to reach your site at the url you configured. When you expand the Graphite group you should see a uwsgi group available that contains metrics about the running instance of uwsgi (graphite itself).

Update July 1st, 2013:

Currently, the ceres maintenance plugins are not included when installing, so it’s not possible to keep your ceres databases cleaned properly (see this issue).  For now, you need to do the following as the graphite user:

cd $GRAPHITE_ROOT/
cp -rfp src/carbon/plugins/maintenance plugins/maintenance

Then, edit your crontab (crontab -e) and add this line:

7 1 * * * /opt/graphite/bin/ceres-maintenance --configdir=/opt/graphite/conf/carbon-daemons/writer/ rollup

Update 2: March 17th, 2015

Much has changed since I wrote this blog post. Please see akuzmin’s comments below for things he had to do differently from the above instructions. Thank you, akuzmin!

Writing Python like a Jedi

Jedi is an auto-completion library for Python code that I’ve so far really enjoyed using in vim. It’s able to analyze your code (and anything you import) to guess what you mean when you invoke it (Ctrl+Space by default). Out of the box with jedi-vim, the configuration requires a bit more keypressing than I’m generally happy with, so I used Supertab as suggested. It’s advanced enough to know the types of your variables and the argument names for your function calls. I’ve included instructions below that should get you up and running fast.

  1. If you don’t already use it, configure pathogen.vim:
    1. Get pathogen:
      mkdir -p ~/.vim/autoload ~/.vim/bundle; \
      curl -Sso ~/.vim/autoload/pathogen.vim https://raw.github.com/tpope/vim-pathogen/master/autoload/pathogen.vim
    2. Only do this if you don’t have an existing vimrc file:
      echo "syntax on
      filetype plugin indent on" > ~/.vimrc
    3. Add pathogen to your .vimrc file:
      sed -i '1i\
      call pathogen#infect()' ~/.vimrc
  2. Install jedi-vim and jedi:
    cd ~/.vim/bundle/; \
    git clone git://github.com/davidhalter/jedi-vim.git; \
    cd jedi-vim; \
    git submodule update --init
  3. Install Supertab:
    cd ~/.vim/bundle/; \
    git clone git://github.com/ervandew/supertab.git
  4. Configure Supertab:
    echo 'let g:SuperTabDefaultCompletionType = "context"' >> ~/.vimrc
  5. Optional: Disable auto-complete on . (bothers me, up to you)
    echo 'let g:jedi#popup_on_dot = 0' >> ~/.vimrc

At this point, you can begin to type a member of a library and hit <Tab> to automatically suggest ways to finish (or just type <Tab> after a . to show all available options).

Pianobar – An open source Pandora client

I’ve been using pianobar for about two weeks now and have yet to experience any crashes that plagued my usage previously. It is by far the most efficient, stable way to use Pandora. In Ubuntu, you can install it from the software center or via “apt-get install pianobar”. I also recommend installing libnotify-bin if you want to use notifications on song changes (instructions below).

Once installed, you can either run it straight away by opening a terminal and typing “pianobar”, or you can set up some configurations first to enhance your experience. I use a shell script to catch events from the player and display notifications with the song artist and title.

For configuration, edit ~/.config/pianobar/config in your favorite editor. Here is my configuration (note that I pay for Pandora One, if you do not, you can’t specify mp3-hifi as your audio_format):

event_command = /home/myuser/bin/pianobar-notify
user = user@domain.com
password = yourpassword
audio_format = mp3-hifi

The script at /home/myuser/bin/pianobar-notify will be called any time an “event” is sent. See the man page for details on how you can extend this. Below is the pianobar-notify script I use (don’t forget to chmod +x):

#!/bin/bash
# create variables
while read L; do
k="`echo "$L" | cut -d '=' -f 1`"
v="`echo "$L" | cut -d '=' -f 2`"
export "$k=$v"
done < <(grep -e '^\(title\|artist\|album\|stationName\|pRet\|pRetStr\|wRet\|wRetStr\|songDuration\|songPlayed\|rating\|coverArt\)=' /dev/stdin) # don't overwrite $1... case "$1" in songstart) # echo 'naughty.notify({title = "pianobar", text = "Now playing: ' "$title" ' by ' "$artist" '"})' | awesome-client - # echo "$title -- $artist" > $HOME/.config/pianobar/nowplaying
# # or whatever you like...
notify-send "Pianobar - $stationName" "Now Playing: $artist - $title"
;;

# songfinish)
# # scrobble if 75% of song have been played, but only if the song hasn't
# # been banned
# if [ -n "$songDuration" ] &&
# [ $(echo "scale=4; ($songPlayed/$songDuration*100)>50" | bc) -eq 1 ] &&
# [ "$rating" -ne 2 ]; then
# # scrobbler-helper is part of the Audio::Scrobble package at cpan
# # "pia" is the last.fm client identifier of "pianobar", don't use
# # it for anything else, please
# scrobbler-helper -P pia -V 1.0 "$title" "$artist" "$album" "" "" "" "$((songDuration/1000))" &
# fi
# ;;

*)
if [ "$pRet" -ne 1 ]; then
notify-send "Pianobar - ERROR" "$1 failed: $pRetStr"
elif [ "$wRet" -ne 1 ]; then
notify-send "Pianobar - ERROR" "$1 failed: $wRetStr"
fi
;;
esac

Have fun enjoying your music without a web browser!

ADB over SSH – Fun with port forwards

So last week one of my coworkers and I were discussing a VPN configuration to allow adb shells over 3G. Just tonight I realized that a VPN isn’t even required, SSH can do the same job with relatively little effort. Here’s how I rigged my setup.

Prerequisites:

  • A functional SSH server, accessible from outside your network.
  • Connectbot on your phone with a connection configured for your home computer.
  • A functional ADB over USB install with correct PATH variables set. When you open a new command prompt and type “adb shell” you should see a prompt from your phone.

Configuration of the above items are well documented elsewhere and will be outside the scope of this article.

So, having the prerequisites in order, you start by modifying your Connectbot connection as follows:

  • Long-press your connection in the list and choose “Edit host”.
  • Press “Post-login automation”.
  • In the box type “adb connect localhost:5555[ENTER]” the new line here ([ENTER] key) is necessary to automatically run the command.
  • Press “OK”.
  • Press back to return to the connection list.
  • Long-press your connection in the list and choose “Edit port forwards”.
  • Press Menu, then “Add port forward” and enter the following:
    • Nickname: “ADB”.
    • Type: “Remote”.
    • Source port: “5555”
    • Destination: “localhost:5555”
  • Press “Create port forward”.

Your connection is now configured to tunnel the ADB protocol over port 5555 from your computer to the phone via reverse SSH tunnelling. The next step is to configure ADB on the phone to listen over tcp/ip:

  • On your computer, with the phone connected via USB, type “adb tcpip 5555”.

That’s it! You can now disconnect your USB cable, take your phone on a car ride, etc. If you need to use adb with it, simply use Connectbot to connect to your home computer, after the connection is authenticated (you can use password or public-key) the adb connection will be made automatically, so you simply have to use adb as you normally would!

Remember that over 3G you’re going to have some delay for commands, here’s an example push:


redkrieg@h4xt0p:~$ time adb push Downloads/UniversalAndroot-1.6.2-beta5.apk /sdcard/
11 KB/s (964401 bytes in 83.041s)
redkrieg@h4xt0p:~$ ls -hal Downloads/UniversalAndroot-1.6.2-beta5.apk
-rw-r--r-- 1 redkrieg redkrieg 942K 2010-10-08 15:08 Downloads/UniversalAndroot-1.6.2-beta5.apk
redkrieg@h4xt0p:~$

So yeah, it’s slow as dirt, but I totally pushed a file from my home computer to my phone from across the city.

To undo this and restore normal USB ADB functionality, you must first connect with Connectbot using the instructions above, then from your computer run “adb usb” to return the phone to USB mode. If you’re unable to do this, you’ll need to run the following from a local shell on the phone:


su
setprop service.adb.tcp.port -1
stop adbd
start adbd

That’s it. Have fun!

Update: I’ve just thought things through and realized that this leaves root wide open to remote exploit if someone knows your IP. Probably best to switch back to USB adb once you’re done until I figure out a good way to block non-localhost connections to 5555 in iptables on boot. If you know how to do this, please post a comment, otherwise it’ll be my project for the night.

Update 2:
After some testing, it seems like T-mo blocks inbound connections like this, so iptables shouldn’t be necessary. That being said, the following rules should take care of any lingering doubt:


iptables -A INPUT -p tcp --dport 5555 -s 127.0.0.1 -j ACCEPT
iptables -A INPUT -p tcp --dport 5555 -j DROP

WEP Cracking with WifiWay

This weekend one of my friends asked about hacking in to wireless networks. I decided to show off and they wanted to video the experience, so I set up a spare wireless router with 7961122705933aa134db338064 as the WEP encryption key. I then rebooted in to a livecd called Wifiway. Since this video was created, there’s been a new release of Wifiway that includes the airoway script I use, so there’s no need for the thumbdrive now. Click Read More… below to view the video! The actual crack takes about three minutes, the rest of the video is just preparation of the access point.
Continue reading WEP Cracking with WifiWay

GnuPG E-mail Encryption

I’ve recently started using GnuPG to encrypt email transmission with the aid of the new FireGPG extension to firefox which allows one to use public key encryption in gmail. The extension can be found at it’s homepage. My public key can be found here if you would like to communicate with me securely. But what is public key encryption? I’ll give a layman’s introduction here. Hopefully I’ll explain it in a way you can understand.
Continue reading GnuPG E-mail Encryption

Ghost 4 Linux complete guide to imaging

About a month ago I was given 65 new Dell Optiplex 745’s to replace my 6 year old desktops in my training environment. This presented a multitude of problems for me.

Problems:

  1. Our imaging software ran off of a floppy disk.
  2. It was DOS based, and I hate DOS
  3. It couldn’t detect SATA drives (you would not believe how mad I was when I finally solved the floppy problem just to run into this).

As usual, I’m dumped into this with no support of note and a limited time frame. Not to mention all of my normal duties. So what do I do? The same thing I do whenever I have an insurmountable obstacle… Turn to Linux.

Ghost 4 Linux is a CD based distro designed with imaging in mind. It’s really useful and all that, blah blah blah. This post isn’t about extolling its many virtues. This post is to teach you how to use it. More accurately, this post is to teach my coworkers at our other sites to replicate my setup. I’ve included below the document I sent to them so they could get up and running with Windows 2003 servers.

Enjoy.

Ghost 4 Linux instructions

Ghost 4 Linux is natively a CD based distribution; however it can be easily modified to run from a network boot. These instructions assume you are using a Windows 2003 Server for DHCP.
Continue reading Ghost 4 Linux complete guide to imaging

Black 360 Universal Remote Mod

I finally got my universal remote apart without breaking it in half and decided to throw together a little how-to for all the people having trouble getting it apart to paint it.

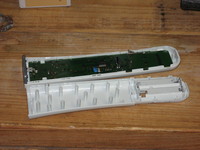
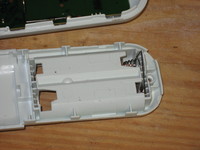
  1. Here we have the remote, battery cover removed. Notice the screw at the far end of the battery cover. It is normally covered by a sticker.
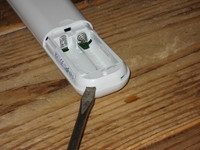
  2. Use a flat head screwdriver to pry the back tabs up, releasing the battery case.
  3. I used a vice to apply pressure to both sides of the controller. Because of its shape, you’ll need to slide it back and forth gradually as you apply pressure to prevent any blemishes. Also be sure to use a rag to keep the plastic away from the metal.
  4. Pull up at the seam until the side pops out. You’ll only need to get one side loose, the other will follow naturally.
  5. Bottom of remote removed.
  6. Be sure to remove these metal bits before painting, thank me later.
  7. Main board removed. I used masking tape over the IR screen, rather than try to separate it from the gray plastic before painting.
  8. Remote fully disassembled. Be sure not to lose anything!
  9. Check out Alcaron’s tutorial for painting tips.
  10. Close ups of the individual parts after painting. I painted in the dark, which was a major mistake. Always paint during the day.
  11. And our finished product. Notice the awful paint job which I’ll be sanding down and repainting tomorrow. I just wanted to get this up today. Hope you all enjoyed!

Please, let me know if you give this a shot, I really love the look.

Black Controller Mod

I’ve been a busy little bee this holiday break and decided to modify one of my xbox360 controllers following this guide by Alcaron. It came out way better than I thought it would, the only issue I had being that the battery compartment button didn’t hold the paint, so it’s starting to scratch off. Other than that one (easy to fix) blemish, I think the whole project worked well, and I’ll be repeating the process for my other controller and all my accessories soon… If only I can figure out how to get that damned universal remote apart. Here’s the pics! Enjoy!